Run
Start / Run Application

This action allows you to start or run an application on your desktop computer
Special Case: Launching Steam Games
Launching Steam games is not possible directly using this Action. To launch a Steam game you need to use the steam id and use the Open URL action instead from the Navigation category like this:

Special Case: Launching Epic Games
Launching Epic games is not possible in the normal way just like Steam games. To launch an Epic game you need to do similar steps as with the steam option. First you need to open the properties of the normal shortcut on your desktop to that game. It will hold an url that you need to copy and use on an Open URL action instead from the Navigation category.
Special Case: Windows Apps
Windows apps are a special type of application. They are different from normal executables. Touch Portal has no trouble opening such applications but finding them can be difficult. Here is how you run windows Apps with Touch Portal:
- Open a file explorer
- Enter this value: shell:AppsFolder
- This will open the applications folder.
- Pick the application you want to start
- Right mouse click and choose "Create Shortcut"
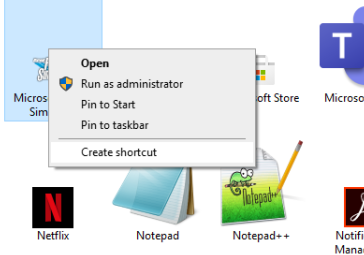
- Now use this shortcut in the Run shortcut action
What to do when the application is not launched?
Some applications will not start up using this action. To be able to start such an application, create a shortcut to the application and use the Run-a-shortcut-action instead and point it to your created shortcut.
Open File

This action allows you to start any file. This will ask the OS to open or start the file.
Open Folder

This action allows you to open a folder in your OS explorer.
Run Batch Script

This action allows you to execute Batch scripts.
Run Powershell Script

This action allows you to run a PowerShell script file
Open Windows Restrictions
Touch Portal requires that the execution policies of Powershell are unrestricted. By default Windows sets it on restricted so we need to change that. Do the following:
- Open a Command Prompt in Windows (cmd.exe)
- Type "Powershell" and press enter.
- Powershell is now started. When in Powershell run the following two commands
- Set-ExecutionPolicy -Scope CurrentUser -ExecutionPolicy Bypass -Force;
- Set-ExecutionPolicy -Scope CurrentUser -ExecutionPolicy Unrestricted -Force;
- These two options allow you to run any script (unrestricted) and will not prompt a message with the question whether it is safe to run your selected script (bypass)
Run Apple Script
This action allows you to execute an Apple script
Run Windows Apps

This action allows you to run a Windows (UWP) Apps, steam games, epic games, gog games and other apps
Execute Script
This action allows you to execute a script.
Nav
Go To Page

This action allows you to navigate to the selected Page.
Go To Page On Device
- Multiple Devices Upgrade RequiredThis action allows you to navigate to the selected Page on a specific device.
Open Url

This action allows you to open an URL in your standard browser.
When A Page Is Changed
- Pro Upgrade Required
This event is triggered when a Page is changed on your device.
Input Keyboard
Low Level Key Press

This action allows you to do low level key presses. While still software driven key presses they are triggered on a lower level in the OS than the virtual key presses. Low Level Key presses can be used with keyboards from different countries to do language specific key presses as well.
Virtual Key Press

This action allows you to do virtual key presses. Virtual key presses are software simulated key presses requested to the OS.
Hold Key Press
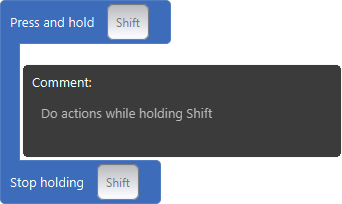
This action allows you to keep pressing a key or a combination of keys while execution other actions during that pressing down.
Write Text
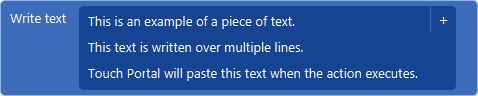
This action allows you to write text.
Input Mouse
Mouse Click

This action allows you to click with the mouse on a specific location
Move Mouse

This action allows you to move the mouse to a specific location on your screen(s)
Drag Mouse

This action allows you to drag the mouse from and to specific locations on your screen(s)
Utility Touch Portal Functions
Refresh Webview
- Pro Upgrade Required
This action allows you to refresh the browser of a specific webview with the given id. The webview needs to be visible on a connected device.
Restart Touch Portal

With this action you can restart Touch Portal.
Set / Load Webview Url
- Pro Upgrade Required
This action allows you to load a new URL in the specified webview.
Switch Event On / Off
- Pro Upgrade Required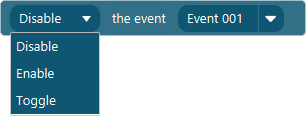
This action allows you to turn global Event on and off.
On Touch Portal Initialized
- Pro Upgrade Required
This event is triggered when Touch Portal is initialized.
Toggle Plugin Action
This action allows you to start or stop plugins using actions
Utility Clipboard
Clipboard Content To Value

With this action you store the current contents of the systems clipboard to a Value.
Copy File To Clipboard

With this action you store the specified file in the clipboard
Copy Image To Clipboard

With this action you store the specified image in the clipboard
Set Clipboard Content

With this action you can copy text to the clipboard.
Utility System And Applications
Activate Application (foreground)

This action allows you to bring an application on your computer to the foreground (activate)
Close Application

This action allows you to close an application on your computer.


Logic
Wait For (timer)
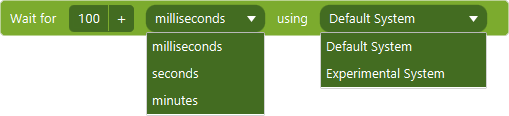
This action allows you to add a time to wait. This will pause the execution of the flow of actions until the timer has finished.
Logic If Statement Extended
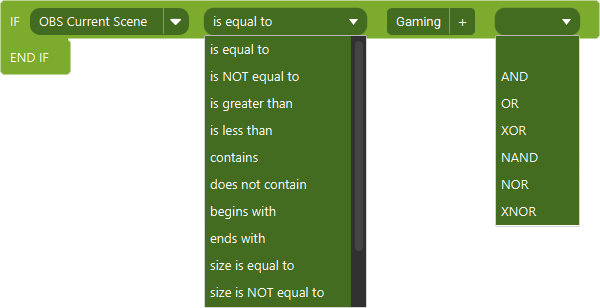
This logic action allows you to run actions based on specific criteria.
Logic If Statement
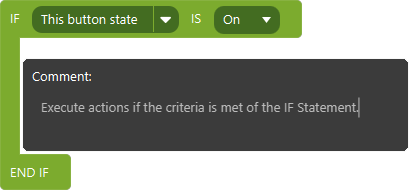
This logic action allows you to run actions based on specific criteria.
Logic Else
This action can be used together with logic IF actions to create the flow of actions to do when the IF does not meet the criteria.
If File Statement
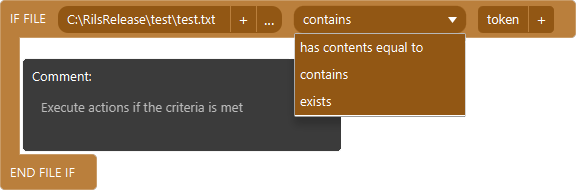
This action allows you to add logic based on the specified file. This allows you to check if a given file exists, has content that equals or if it contains a given text. If it meets the criteria this If File statement will continue with executing actions within the scope of this If Statement. If not it will continue with the actions after the scope of this IF File Statement. If the file cannot be accessed it will not meet the criteria and will act accordingly.
Logic Repeat X Times

This logic action allows you to create a repeating loop that will execute the flow of actions within its context x amount of times
Execute Flow

This action allows you to execute a predefined Flow.
Stop Executing Actions In Current Flow
This action allows you to stop the current flow of actions to be stopped. All actions after this will be dropped and not executed. Every collection of actions (On Press, On Event etc.) within Touch Portal is seen as a flow. The Flow object is also a flow of actions.
Dynamic Text Updater

This event will update the button text each 500ms with the given text. If using Dynamic Text Variables, they will be evaluated each iteration and should always show the up to date value.
Value
Set Value To / Change Value To
- Pro Upgrade Required
This action allows you to change what the Value.
Get Url Content And Store In Value
- Pro Upgrade Required
This action allows you to retrieve the contents from an URL and store it into the specified Value
When Value Changes
- Pro Upgrade Required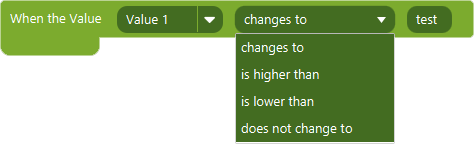
This event allows you to trigger on when a Value changes.
When Plugin Value Changes
- Pro Upgrade Required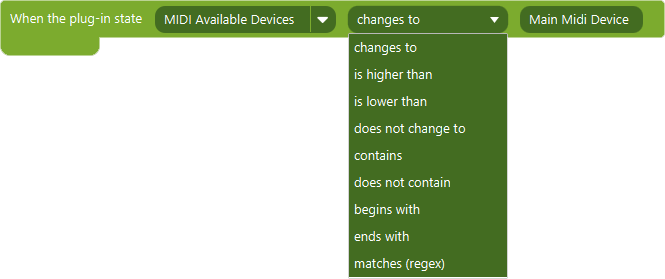
This event allows you to trigger on when a Plugin State changes.
Button State
Set Button State
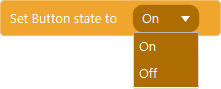
This action allows you to set the button state to either On or Off
Set Other Button State

This action allows you to set the state of a button with the given id to On or Off.
Toggle Button State
This action allows you to toggle the button state to either on or off. This action will switch from the current state.
When Button State Changes

This event allows you to act on the event that is triggered when the state of the button changes.
Value Text Manipulation
Set Value Capitalization
- Pro Upgrade Required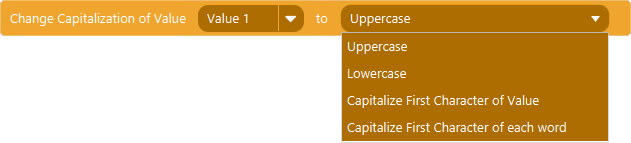
This action allows you to capitalize the text Value.
Replace (regex) In Value
- Pro Upgrade Required
This action allows you to replace a given part of the Value Object with another value.
Get Subtext
- Pro Upgrade Required
This action allows you to get part of a text Value
Get Length Of Value
- Pro Upgrade Required
This action allows you to get the length of a given text and store it into a Value.
Trim Value
- Pro Upgrade Required
This action allows you to trim the text Value
Split Value And Get N-th
- Pro Upgrade Required
This action allows you to split a text with a delimiter and get the nth item from the split text.
Get Index Of
- Pro Upgrade Required
This action allows you to get the index of a given character or text from a text
Get Occurrence Count
- Pro Upgrade Required
This action allows you to count occurences of text in a text and store it into a Value
Value Number Manipulation
Advanced Value Calculations
- Pro Upgrade Required
This action allows you to do advanced calculations with numbers.
Important behavior description
This advanced calculation action works with types of data. This means that it makes a distinction between Integers and Doubles (whole numbers and decimal numbers) for example. This means that 9 / 5 will result in 1 and 9.0 / 5 will result in 1.8. Be sure to keep this in mind when using this action.
Available Calculation methods
The list below shows all calculation operators and functions available:
- Plus operator - The usual + operator is used. For example 6 + 9
- Subtraction operator - The usual - operator is used. For example 9 - 6
- Multiplication operator - The usual * operator is used. For example 9 * 6
- Division operator - The usual / operator is used. For example 9 / 3
- Modulus operator - The % operator is used. An alternative is the mod operator. For example 5 mod 2 gives 1 and is equivalent to 5 % 2
- Random - Use tp.random() to generate a random number.
- Power - Use tp.pow(10,2) to calculate 10 raised to the power of 2 which is 100
- Absolute - Use tp.abs(-15) to get the absolute value, in this example 15.
- Square Root - Use tp.sqrt(16) to get the square root of a number, in this example 4.
- Exp - Use tp.exp(4). e raised to the power of a number. e is the base of the natural system of logarithms (approximately 2.718282).
- Log - Use tp.log(5) to get the natural logarithm of 5 in this example.
- Log10 - Use tp.log10(5) to get the base 10 logarithm of a 5 in this example.
- Sine Function - Use tp.sin(5) to get the sine of 5 in this example.
- Cosine Function - Use tp.cos(5) to get the cosine of 5 in this example.
- Tangent Function - Use tp.tan(5) to get the tangent of 5 in this example.
- Inverse Sine Function - Use tp.asin(5) to get the inverse sine of 5 in this example.
- Inverse Cosine Function - Use tp.acos(5) to get the inverse cosine of 5 in this example.
- Inverse Tangent Function - Use tp.atan(5) to get the inverse tangent of 5 in this example.
- Hyperbolic Sine Function - Use tp.sinh(5) to get the hyperbolic sine of 5 in this example.
- Hyperbolic Cosine Function - Use tp.cosh(5) to get the hyperbolic cosine of 5 in this example.
- Hyperbolic Tangent Function - Use tp.tanh(5) to get the hyperbolic tangent of 5 in this example.
Increment Value
- Pro Upgrade Required
This action allows you to increment a Value with a given number.
Randomize Value
- Pro Upgrade Required
This action allows you to generate a random (whole) number and store it in a Value
Round Value Number
- Pro Upgrade Required
This action allows you to round the number stored in a Value.
Value Calculations
- Pro Upgrade Required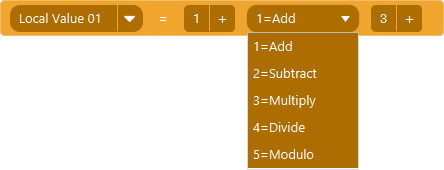
This action allows you to do standard calculations with numbers.
File Input Output
Create File

This action allows you to create a file. If the specified file already exists on disc then this action will fail silently.
Write To File

This action allows you to write content to a file. The file is cleared of contents before writing.
Append To File

This action allows you to append text to the given file
Delete File

This action allows you to delete a file. If the file does not exist this action will fail silently.
File To Value
- Pro Upgrade Required
This action allows you to store the contents of a file into a Value. If the file does not exist nothing will happen. If the file cannot be read, nothing will happen.
Get Line Count From File

This action allows you to the line count from a text file. If the file does not exist nothing will happen. If for some reason the file cannot be read nothing will happen.
Get Line From File

This action allows you to get a specified line from a text File. If the file does not exist nothing happens. If the given line number is not a number nothing happens. If the file has less lines than the line number given, the last line is used.
Remove Lines From File

This action allows you to remove lines from a text file.
Url Result To File

This action allows you to get the result of a endpoint (url) and store it into a file
When A File Changes

This events can be set up to listen when the contents of a file changed.
Http
Http Get
This action allows you to do a GET call to a given endpoint.
Http Post
This action allows you to do a POST call to a given endpoint.
Http Put
This action allows you to do a PUT call to a given endpoint.
Http Patch
This action allows you to do a PATCH call to a given endpoint.
Http Delete
This action allows you to do a DELETE call to a given endpoint.
Visuals
Change Button Visuals
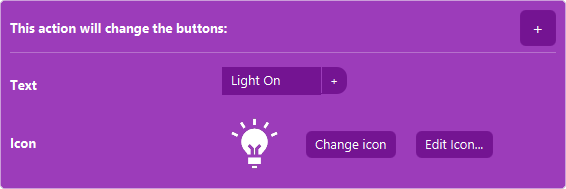
This action allows you to change the visuals of a button
Restore Buttons Original Visuals

This action allows you to restore parts of the original button visuals setup.
Change Visuals By Plug-in State
- Pro Upgrade Required
This action allows you to change the background color, the text color or the icon from a plugin state.
Comment
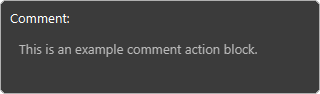
This action allows you to add comments in your flow of actions. This comment action does not execute anything.
Url To Button Icon
With this action you can load an url image and set that image as the icon.
Change Page Background Image

This action allows you to change the image of the Page.
Change Graphics Upgrade Settings
- Graphics Upgrades RequiredThis action allows you to change the Graphics Upgrade settings for the button
Change Page Graphics Upgrade Setting
- Graphics Upgrades RequiredThis action allows you to change the graphics upgrade settings for a Page.
Keep Button Icon The Same As External File
This event will keep track of the image file pointed to. Whenever the file is changed, it will update the icon of the button.
Media
Play Audio File Advanced
This action allows you to play an audio files (wav and mp3) over a chosen audio output. The fade in components are available from version 4.2 of Touch Portal.
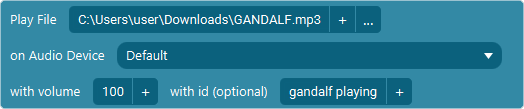
Play Audio File

This action allows you to play an audio file (wav and mp3) over the general audio output.
Stop All Playing Audio
This action will stop all audio played by Touch Portal.
Stop Audio With Id

This action allows you to stop specific audio which was started by the advance audio play action and was started with a given id
Media Toggle Play / Pause
This action allows you to play, resume or pause a track on the current audio application active on the OS.
Set Volume Audio With Id

This action allows you to set the volume of an audio file played by Touch Portal with the given ID.
Stop And Fade Audio With Id
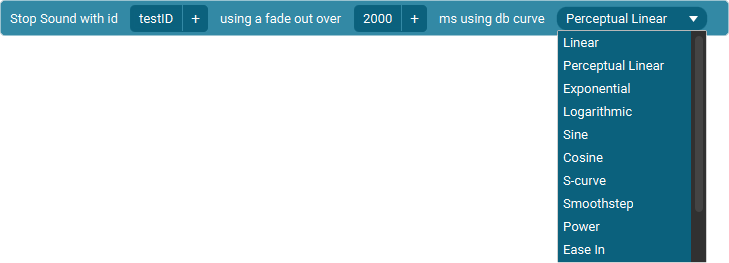
This action allows you to stop and fade out a specific audio which was started by the advance audio play action and was started with a given id
Media Stop
This action allows you to stop a track on the current audio application active on the OS.
Media Next Track
This action allows you to go to the next track on the current audio application active on the OS.
Media Previous Track
This action allows you to go to the previous track on the current audio application active on the OS.
Volume Up
This action allows you to get the volume 1 percent up on the current active media application on your OS, when no application is listening then this will change the volume of the OS itself.
Volume Down
This action allows you to get the volume 1 percent down on the current active media application on your OS, when no application is listening then this will change the volume of the OS itself.
Volume Mute
This action allows you to mute the volume on the current active media application on your OS, when no application is listening then this will change the volume of the OS itself.
Set Volume Of The Default Windows Audio Source
This action allows you to set the volume of the default windows audio source (both input as output)
Set Volume Of The Default Windows Audio Source
This action allows you to set the volume of the default windows audio source (both input as output)
Set Volume Of Windows Audio Source
This action allows you to set the volume of a given windows audio source (both input as output)
Set Volume Of Windows Audio Source
This action allows you to set the volume of a given windows audio source (both input as output)
Increase / Decrease Volume Windows Audio Source
This action allows you to increase or decrease the specific Windows audio source.
Toggle Mute State Of Windows Audio Source
This action allows you to toggle, set or unset the mute state of a given windows audio source.
Set Volume Of Current Output On Macos
This action allows you to set the volume of the current selected speaker (output) on MacOS
Set Volume Of Current Output On Macos
This action allows you to set the volume of the current selected speaker (output) on MacOS
Set Volume Of Current Microphone On Macos
This action allows you to set the volume of the current selected microphone (input) on MacOS
Set Volume Of Current Microphone On Macos
This action allows you to set the volume of the current selected microphone (input) on MacOS
When Volume Specific Audio Device Changes

This event allows you to act on volume changes of specific audio devices
When Windows Default Audio Device Mute State Changes
This event will listen to the mute state of the current Windows audio source
When Windows Audio Source Mute State Changes
This event will listen to the mute state of the given Windows audio source
Obs
Set Streaming State
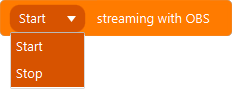
This action allows you to set the state of streaming, in other words start and stop a stream.
Set Recording State
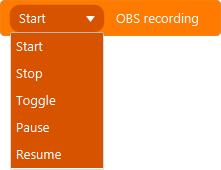
This action allows you to set the state of recording within OBS.
Set Profile

This action allows you to change the current OBS Profile
Set Scene Collection

This action allows you to activate a scene collection.

Set Preview Scene

This action allows you to set the Preview scene
Set Scene Filter

This action allows you to turn on or off a filter on a scene.
Set Source Visibility
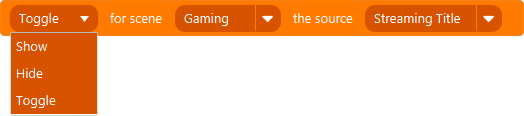
This action allows you to change the visibility of a source
Set Source Filter Visibility

This action allows you to turn a source filter on or off
Set Source Image

This action allows you to set the image of an image source
Set Source Text

With this action you can set a text of a text source directly. This can only be applied to a Text Source.
Set Source Video

This action allows you to set a video on a video source
Set Source Browser Url

This action allows you to set the url of a browser url.
Refresh Browser Source

This action allows you to refresh a browser source
Set Volume

This action allows you to set the volume of a scene specific source.
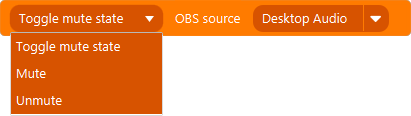
Set Source Mute State
This action allows you to mute or unmute an audio source
Set Volume Source

This action allows you to set the volume of a specific source.
Increase Source Volume

This action allows you to increase the volume in respect to the current volume
Decrease Source Volume

This action allows you to decrease the volume in respect to the current volume
Media Source Play / Pause

This action allows you to play and pause a media source
Media Source Restart

This action allows you to restart a media source
Media Source Stop

This action allows you to stop a media source
Media Source Next

This action allows you to go to the next media source
Media Source Previous

This action allows you to go to the previous media source
Set Studio Mode State
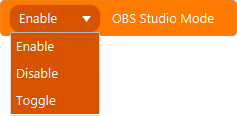
This action allows you to change the Studio Mode state
Set Current Transition
This action allows you to set the current transition
Set Current Transition Duration
This action sets the current transition duration in milliseconds.
Obs Raw Request
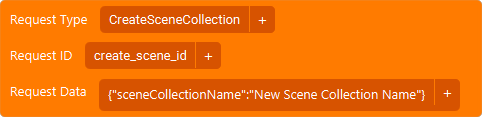
This action allows you to make custom requests to the OBS Websocket v5+. This allows you to do additional requests that are not (yet) implemented directly in Touch Portal.
Screenshot To File

This action allows you to take a screenshot of a scene or source
Set Replay Buffer State
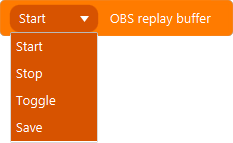
This action allows you to start, stop, toggle or save the replay buffer
Toggle Virtual Cam

This action allows you to toggle the Virtual Cam
On Recording State

This event allows you to listen for changes in the recording state
On Streaming State

This event allows you to listen for changes in the streaming state
On Scene Selected

This event allows you to listen for when the active scene changes
On Previous Scene Selected

This event allows you to listen for when the previous active scene changes
On Source Visibility Change

This event allows you to listen for source visibility changes
On Scene Filter Visibility Change

This event allows you to listen for scene filters visibility changes
On Source Mute State

This event allows you to listen for audio source mute changes
On Source Filter Visibility Change

This event allows you to listen for source filter changes
On Replay Buffer Status Change
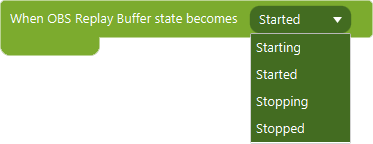
This event allows you to listen for when the replay buffer state changes
On Virtual Cam State Change
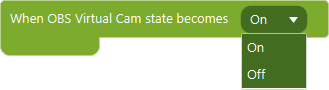
This event allows you to listen for when the virtual cam state changes
Scene Output To Icon Event
This event allows you to show a scene visually on a button.
On Preview Scene Selected

This event allows you to listen for when the active preview scene changes
When Studio Mode Changes
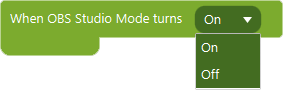
This event allows you to listen for when the studio mode changes
When Custom Request Result Are Returned

This event allows you to listen to the result of a Custom Request by ID
When Profile Is Changed

This event allows you to listen for profile changes in OBS.
Twitch
Send Chat Message

This action allows you to send a message to your channel.
Send Chat Message To Channel

This action allows you to send a message to a specific channel. You need to be a mod in that channel to be able to send messages in that channel.
Send Whisper

This action allows you to send a whisper to a user.
Announcement
This action allows you to do announcements in Twitch
Shout Out

This action allows you to do a shout out to a specific user
Start Advertisement

This action allows you to
Start / Stop Raid

This action allows you to start or stop a raid
Set Marker

This action allows you to set a marker
Channel Info To Value
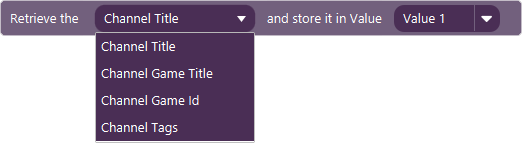
This action allows you to get channel information and store it in a Value
Streamers Channel Info To Value

This action allows you to get channel information from any channel and store it in a Value
Set Stream Category

This action allows you to set the stream category
Set Stream Title

This action allows you to set the stream title
Shield Mode

This action allows you to disable or enable shieldmode
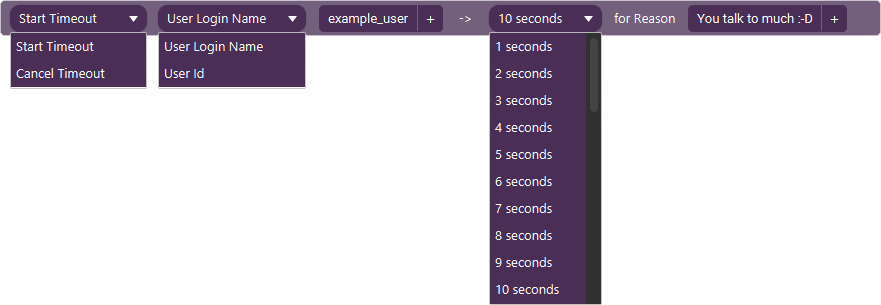
Start / Cancel Timeout User
This action allows you to set a timeout for a user
Streamer Profile Pic Url To Value
- Pro Upgrade RequiredThis action allows you to retrieve the url of the streamers icon or offline image.
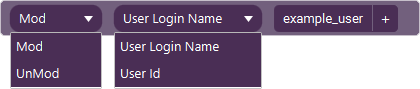
Switch Mod Status Of User
This action allows you to mod or unmod a specific user
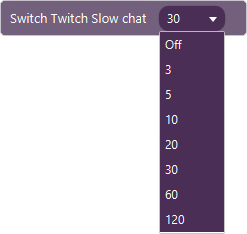
Switch Slow Chat
This action allows you to set the slow chat functionality
Switch Unique Chat
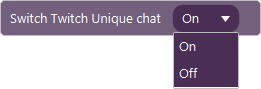
This action allows you to set the unique chat functionality
Switch Vip Status Of User
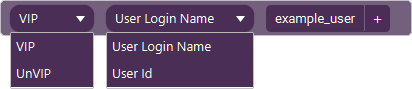
This action allows you to set the VIP status of a user
Switch Emote Only Chat
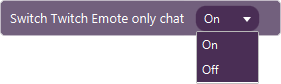
This action allows you to set the emote only chat functionality
Switch Followers Only Chat
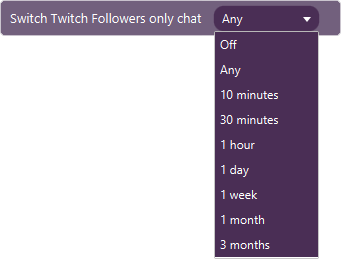
This action allows you to set the followers only chat functionality
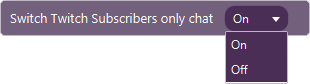
Switch Subscribers Only Chat
This action allows you to set the subscribers only chat functionality
Ban / Unban User

This action allows you to ban or unban a user
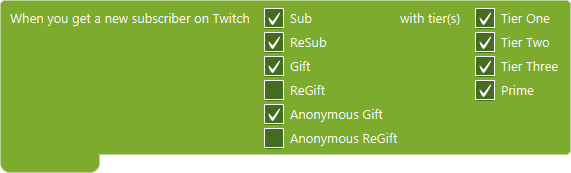
On New Subscriber
This event allows you to listen for new subscribers.
Local States descriptions
The local states listed below are being passed along with the event when the event is triggered. They can be used to act on the specifics of the triggered event.
- Subscription Type - This is the type of subscription, this can be Sub (1), ReSub (2), Gift (3), Anonymous Gift (4), ReGift (5) and Anonymous ReGift (6). In some cases this value will be the number representation of the type within Touch Portal.
- Subscription Gifter Display Name - This is the display name of the user that has gifted the subscription. For anonymouse gifts, this will be "Anonymous" and for non-gift subs and resub it will be the same as the recipient.
- Subscription Gifter Login Name - This is the login name of the user that has gifted the subscription. For anonymous gifts, this will be empty or Twitch API specific. Touch Portal will not interpreted or change this value and is passed along to the event as it is been given from the Twitch API. For subs and resubs this will be the same as the recipient.
- Subscription Recipient Display Name - The display name of the user that receives the subscription.
- Subscription Recipient Login Name - The login name of the user that receives the subscription.
- Subscription Months (raw Data Field) - This field represents the cumulative number of months the gifter has giften in the channel. This is a raw data field passed along unaltered from the Twitch API.
- Subscription Multi Month Duration (raw Data Field) - Number of months gifted as part of a single, multi-month gift OR number of months purchased as part of a multi-month subscription. This is a raw data field passed along unaltered from the Twitch API.
- Subscription Cumulative Months (raw Data Field) - Cumulative number of tenure months of the subscription. This is a raw data field passed along unaltered from the Twitch API.
- Subscription Message - The body of the user-entered resub message. Depending on the type of message, the message body contains different fields. If none is specified this state will be an empty text.
- Subscription is Gifts - This represents whether or not this events subscription is a gift or not. The value will be 1 if it is, 0 if it is not.
- Subscription Sub Plan Name (raw Data Field) - Channel Specific Subscription Plan Name. This is a raw data field passed along unaltered from the Twitch API.
- Subscription Sub Plan Code - Subscription Plan ID, values: Prime, 1000, 2000, 3000 (According to Twitch Documentation) but the Prime version can also be represented as 1.
On Channel Point Redemption

This event allows you to listen for channel points redemption.
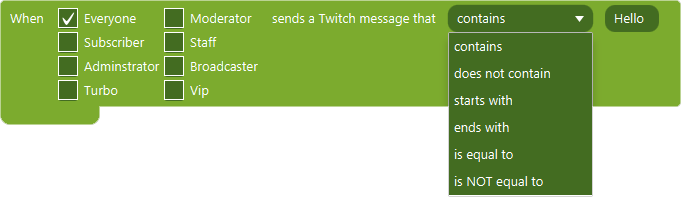
On Chat Message Event
This event allows you to listen for incoming chat messages
On Receiving Bits

This event allows you to listen for received bits between amounts
On Host
This event allows you to listen for when another user starts to host your stream
On Raid
This event allows you to listen for when another user starts to raid your stream
When Slow Mode Changes
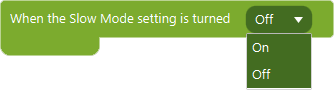
This event will listen to the slow chat being active or not
When Unique Mode Changes

This event will listen to the unique chat being active or not
When Followers Only Chat Changes

This event will listen to the followers only chat being active or not
When Emotes Only Chat Changes
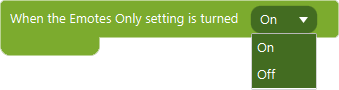
This event will listen to the emotes only chat being active or not
On New Whisper

This event will listen for new whispers
On Gift Sub Bomb

This event allows you to listen for gift sub bombs
On User Ban Or Unban
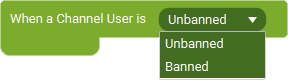
This event allows you to listen for timeouts, bans and unbans on your channel. Use the below listed local states to control for what and how you want the event to act.
Local States descriptions
The local states listed below are being passed along with the event when the event is triggered. They can be used to act on the specifics of the triggered event.
- Issuer User ID - The user ID of the user that issued the ban or unban.
- Issuer User Login name - The user login name of the user that issued the ban or unban.
- Issuer User Name - The user display name of the user that issued the ban or unban.
- (Un)Banned User ID - The user ID of the user that is timed out, banned or unbanned.
- (Un)Banned User Login name - The user login name of the user that is timed out, banned or unbanned.
- (Un)Banned User Display Name - The user display name of the user that is timed out, banned or unbanned.
- Ban Reason - The reason as given by the issuer of the ban (or timeout). This local state is not available for the Unban event.
- Banned at - The UTC date and time (in RFC3339 format) of when the user was banned or put in a timeout. This is a string representation and not a time or data object. This local state is not available for the Unban event.
- Ends at - The UTC date and time (in RFC3339 format) of when the timeout ends. Is empty if the user was banned instead of put in a timeout. This is a string representation and not a time or data object. This local state is not available for the Unban event.
- Is Ban Permanent - Indicates whether the ban is permanent (1) or a timeout (0). If 1, Ends At will be empty.
On Ad Break Start

This event allows you to listen for when a user runs a midroll commercial break, either manually or automatically via ads manager.
Local States descriptions
The local states listed below are being passed along with the event when the event is triggered. They can be used to act on the specifics of the triggered event.
- Ad Break Requester User ID - The ID of the user that requested the ad. For automatic ads, this will be the ID of the broadcaster
- Ad Break Requester User Login - The login of the user that requested the ad.
- Ad Break Requester User Name - The display name of the user that requested the ad.
- Ad Break Time Stamp - The UTC timestamp of when the ad break began, in RFC3339 format. Note that there is potential delay between this event, when the streamer requested the ad break, and when the viewers will see ads. This is a string representation and not a time or data object.
- Ad Break Duration - Length in seconds of the mid-roll ad break requested.
- Ad Break Is Started Automatic - Indicates if the ad was automatically scheduled via Ads Manager
When Channel Info Updates
This event allows you to listen for channel info changes.
Local States descriptions
The local states listed below are being passed along with the event when the event is triggered. They can be used to act on the specifics of the triggered event.
- Title - The channel's stream title.
- Language - The channel's broadcast language.
- Category Id - The channel's category ID.
- Category Name - The channel's category name.
- Classification Labels - String of content classification label IDs currently applied on the Channel separated by commas.
When Twitch Charity Campaign Starts / Progresses / Ends
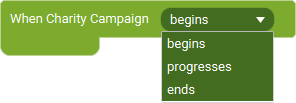
This event allows you to listen for Charity Campaign events.
Local States descriptions
The local states listed below are being passed along with the event when the event is triggered. They can be used to act on the specifics of the triggered event.
- Name - The charity's name.
- Description - A description of the charity.
- Logo - A URL to an image of the charity's logo. The image's type is PNG and its size is 100px by 100px.
- Website - A URL to the charity's website.
- Started At - The UTC timestamp (in RFC3339 format) of when the broadcaster started the campaign. This is a string and not a time or date object. This value will only be filled with the started state.
- Stopped At - The UTC timestamp (in RFC3339 format) of when the broadcaster stopped the campaign. This is a string and not a time or date object. This value will only be filled with the stopped state.
- Current Amount Value - The value of the current amount. This is a decimal number.
- Current Amount Pretty - The value of the current amount. This is a string containing the currency as well, example 100.00 USD or 250.00 EUR
- Target Amount Value - The value of the target amount. This is a decimal number.
- Target Amount Pretty - The value of the target amount. This is a string containing the currency as well, example 100.00 USD or 250.00 EUR
When A Donation Is Made

This event allows you to listen for donations made.
Local States descriptions
The local states listed below are being passed along with the event when the event is triggered. They can be used to act on the specifics of the triggered event.
- Donation Charity Campaign Name - The charity's name.
- Donation Charity Campaign Description - A description of the charity.
- Donation Charity Campaign Logo - A URL to an image of the charity's logo. The image's type is PNG and its size is 100px by 100px.
- Donation Charity Campaign Website - A URL to the charity's website.
- Donator User Id - An ID that identifies the user that donated to the campaign.
- Donator User Login Name - The user's login name.
- Donator User Display Name - The user's display name.
- Donation Amount Value - The amount donated. This is a decimal number.
- Donation Amount Pretty - The donation amount formatted. This is a string containing the currency as well, examples 100.00 USD or 250.00 EUR
When A Poll Begins / Progresses / Ends
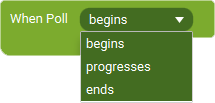
This event allows you to listen for Twitch Poll events.
Local States descriptions
The local states listed below are being passed along with the event when the event is triggered. They can be used to act on the specifics of the triggered event.
- ID - ID of the poll.
- Title - Question displayed for the poll.
- Started At - The time the poll started. This is a String representation, not a time or date object.
- Ends At - The time the poll will end. This is a String representation, not a time or date object.
- Choice Count - The number of choices in this poll.
- Bits Voting Available - Whether bits voting is enabled (1) or not (0).
- Bits Required per Vote - The amount of bits that represent one vote.
- Channel Points Voting Available - Whether Channel Points voting is enabled (1) or not (0).
- Channel Points Required per Vote - The amount of Channel Points that represent one vote.
-
Choices Collection -
This is the collection of choices within this poll. This is a special local state and
requires you to select what part of the choice data structure you want to use. When
you are not using the visual tags system within Touch Portal you need to construct this
value manually. An example is $local2{TwitchPollChoices{[0].title}} where the
important parts to understand are within the double brackets. This first tells which
choice from the choice collection you want to use ([0]), which in this case tells to
use the zero index of the collection which is the first item. Then the second part of the
code is the attribute you want to use from that object. In this case we want the title,
which combined is [0].title.
all options are:
id ID for the choice. title Text displayed for the choice. bits_votes Currently Not used by Twitch; will be set to 0. channel_points_votes Number of votes received via Channel Points. votes Total number of votes received for the choice across all methods of voting.
When Hype Train Starts / Progresses / Ends
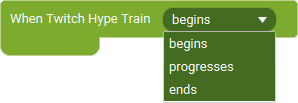
This event allows you to listen for hypetrain events.
Local States descriptions
The local states listed below are being passed along with the event when the event is triggered. They can be used to act on the specifics of the triggered event.
- Total - Total points contributed to the Hype Train.
- Progress - The number of points contributed to the Hype Train at the current level.
- Goal - The number of points required to reach the next level.
- Level - The starting level of the Hype Train.
- Started At - The time when the Hype Train started. This is a textual representation of the time, it is not a time or date object.
- Expires At - The time when the Hype Train expires. The expiration is extended when the Hype Train reaches a new level. This is a textual representation of the time, it is not a time or date object.
-
Last Contributor -
The most recent contribution. This is a comma separated string in the format
, , , , . Check out the Twitch API documentation for more information about these structures and data fields. - Top Contributions (raw) - The contributors with the most points contributed. This is the string representation of the raw JSON object received from Twitch. We suggest to use a JSON parsing plugin to get the data from this string. Check out the Twitch API documentation for more information about these structures and data fields.
When Twitch Goal Starts / Progresses / Ends
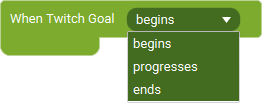
This event allows you to listen for Goal events.
Local States descriptions
The local states listed below are being passed along with the event when the event is triggered. They can be used to act on the specifics of the triggered event.
-
Goal Type -
The type of goal. Possible values (from Twitch API Documentation) are:
follow The goal is to increase followers. subscription The goal is to increase subscriptions. This type shows the net increase or decrease in tier points associated with the subscriptions. subscription_count The goal is to increase subscriptions. This type shows the net increase or decrease in the number of subscriptions. new_subscription The goal is to increase subscriptions. This type shows only the net increase in tier points associated with the subscriptions (it does not account for users that unsubscribed since the goal started). new_subscription_count The goal is to increase subscriptions. This type shows only the net increase in the number of subscriptions (it does not account for users that unsubscribed since the goal started). - Goal Description - A description of the goal, if specified, otherwise empty. The description may contain a maximum of 40 characters.
- Goal is Achieved - A value that indicates whether the broadcaster achieved their goal. Is 1 if the goal was achieved; otherwise, 0. This field is only available for the event when the Goal ends.
- Goal Target Amount - The goal's target value.
- Goal Current Amount - The goal's current value.
- Goal Started At - The UTC timestamp in RFC 3339 format, which indicates when the broadcaster created the goal. This is a String representation and not a date or time object.
- Goal Ended At - The UTC timestamp in RFC 3339 format, which indicates when the broadcaster ended the goal. This is a String representation and not a date or time object. This field is only available for the event when the Goal ends.
When Twitch Prediction Starts / Progresses / Ends
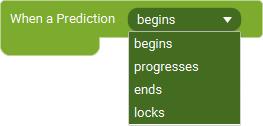
This event allows you to listen for Prediction events.
Local States descriptions
The local states listed below are being passed along with the event when the event is triggered. They can be used to act on the specifics of the triggered event.
- Prediction Id - Channel Points Prediction ID.
- Prediction Title - Title for the Channel Points Prediction.
- Prediction Started At - The time the Channel Points Prediction started. This is a String representation, not a time or date object.
- Prediction Locks At - The time the Channel Points Prediction will automatically lock. This is a String representation, not a time or date object. Not available in the Lock Event.
- Prediction Locked At - The time the Channel Points Prediction was locked. This is a String representation, not a time or date object. Only available in the Lock event
- Prediction Outcome Count - The amount of outcomes in the outcome collection.
-
Predictions Outcome Collection -
The outcomes collection contains an object that describes each outcome and, if applicable,
the number of users who selected that outcome and the number of Channel Points for that outcome.
This is a special local state and
requires you to select what part of the outcome data structure you want to use. When
you are not using the visual tags system within Touch Portal you need to construct this
value manually. An example is $local2{TwitchPredictionOutcomes{[0].title}} where the
important parts to understand are within the double brackets. This first tells which
outcome from the outcomes collection you want to use ([0]), which in this case tells to
use the zero index of the collection which is the first item. Then the second part of the
code is the attribute you want to use from that object. In this case we want the title,
which combined is [0].title.
all options are:
id The outcome ID. title The outcome title. color The color for the outcome. Valid values are pink and blue. users The number of users who used Channel Points on this outcome. channel_points The total number of Channel Points used on this outcome.
On Shout Out Received

This event allows you to listen for when get a Shout Out.
Local States descriptions
The local states listed below are being passed along with the event when the event is triggered. They can be used to act on the specifics of the triggered event.
- Shout Out by User Id - The User ID that identifies the broadcaster that sent the Shoutout.
- Shout Out by User Login - The User Login Name that identifies the broadcaster that sent the Shoutout.
- Shout Out by User Name - The User Name that identifies the broadcaster that sent the Shoutout.
- Shout Out Viewer Count - The number of users that were watching the shout-out-by-broadcaster's stream at the time of the Shoutout.
- Shout Out Started at - The UTC timestamp (in RFC3339 format) of when the moderator sent the Shoutout. This is a String representation and not a date or time object.
On Subscription End
This event allows you to listen for when a user stops being a subscriber to your channel.
Local States descriptions
The local states listed below are being passed along with the event when the event is triggered. They can be used to act on the specifics of the triggered event.
- End Subscription User Id - The user ID for the user whose subscription ended.
- End Subscription User Login - The user login name for the user whose subscription ended.
- End Subscription User Name - The user display name for the user whose subscription ended.
- End Subscription Tier - The tier of the subscription that ended. Valid values are 1000, 2000, and 3000.
- End Subscription Was Gifted - Whether the subscription was a gift.
Streamlabs Desktop
Set Scene

This action allows you to change the current scene
Set Scene Collection

This action allows you to set the scene collection
Source Visibility Toggle

This action allows you to change the visibility of a source
Set Streaming State

This action allows you to start and stop streaming
Set Recording State
This action allows you to start and stop recording
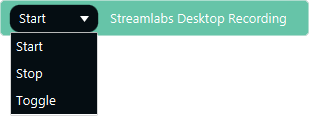
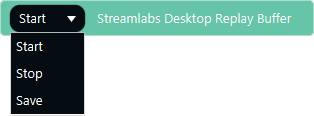
Replay Buffer
This action allows you to start, stop and save a replay buffer
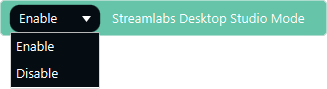
Set Studio Mode
This action allows you to enable or disable Studio Mode
Execute Studio Mode Transition
This action allows you to execute the Studio Mode transition.
Mute Volume

This action allows you to mute and unmute an audio source
When Scene Changes

This event allows you to listen for scene changes
When Scene Collection Changes

This event allows you to listen to scene collection changes
When Source Visibility Changes
This event allows you to listen to scene collection changes
When Streaming State Changes
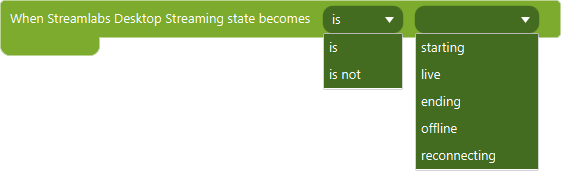
This event allows you to listen to streaming state changes
When Recording State Changes
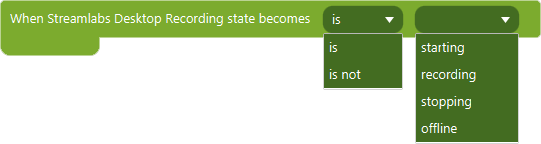
This event allows you to listen to recording state changes
Xsplit

Toggle Source Visibility

This action allows you to toggle the visibility of a source
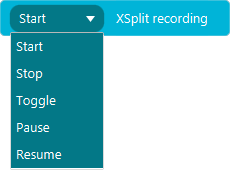
Set Recording
This action allows you to change the recording state
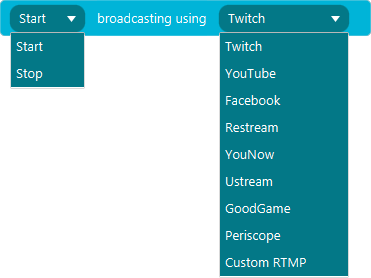
Set Streaming
This action allows you to change the streaming state
Toggle Mute Volume Mic
This action allows you to toggle the mute state of the main mic volume
Toggle Mute Volume Speaker
This action allows you to toggle the mute state of the main volume
Set Volume Default Speaker

This action allows you to change the volume of the main speaker
Set Volume Default Mic

This action allows you to change the volume of the main mic
Set Silence Detection
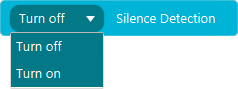
This action allows you to turn on and off the silence detection
Set Noise Suppression
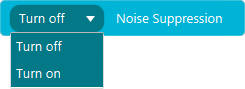
This action allows you to turn on and off the noise suppression
When Recording State Changes

This event allows you to listen to changes in the recording state
When Scene Changes
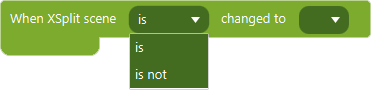
This event allows you to listen to scene changes
Photoshop
Bring Photoshop To The Front
This action allows you to bring the Photoshop window to the front
Set Tool
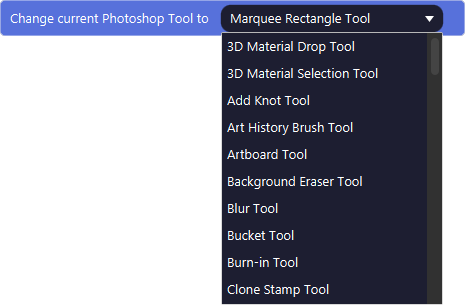
This action allows you to select a tool in Photoshop
Cycle Current Tools Group
This action allows you to cycle through the tools in the current selected group of tools.
Set Main Working Color
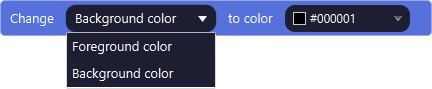
This action allows you to set the main working color in Photoshop.
Set Both Main Working Colors

With this action you set both colors in one go.
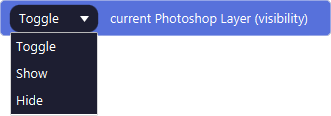
Set Visibility Current Layer
With this action you can set the visibility to show or hide. You can also toggle the state.
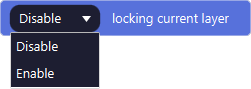
Lock / Unlock Current Layer
With this action you can lock and unlock the current layer
Set Opacity Current Layer

With this action you can set the opacity of the current layer
Set Fill Current Layer

With this action you can set the fill of the current layer
Set Blendmode Current Layer
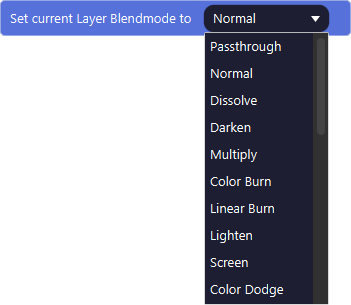
With this action you can set the blendmode of the current layer
Set Text Content Current Layer

With this action you can set the text of the current selected Text layer
Set Current Brush Radius (smart)

With this action you can set the radius of the currently selected Brush
Set Current Brush Hardness (smart)

With this action you can set the hardness of the currently selected brush
Resize Image

With this action you can change the image size of the image.
Resize Canvas
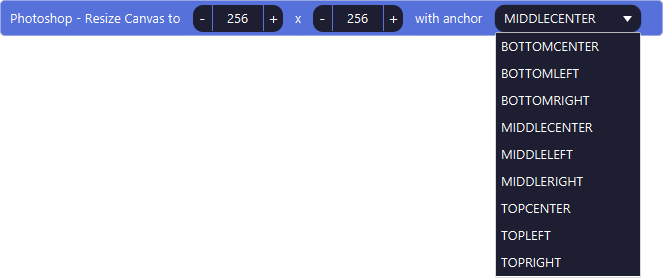
With this action you can change the canvas size of the image.
Trim Image

This allows you to trim the image on four sides by removing the transparent colums or rows.
Execute Custom Photoshop Script
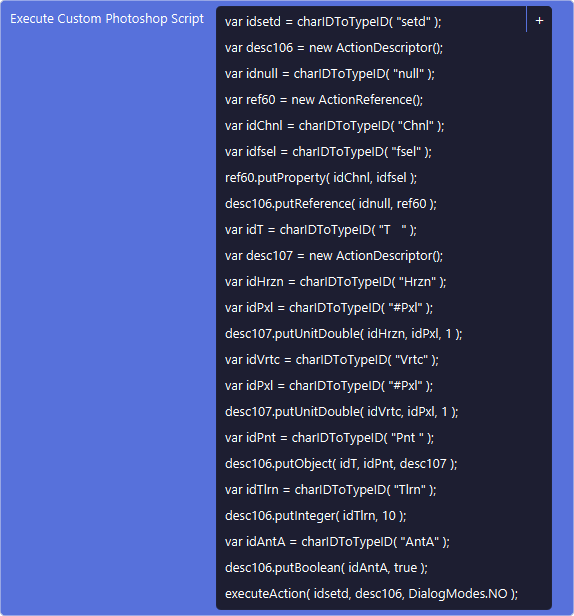
This action allows you to write your own script and execute it within Photoshop
When
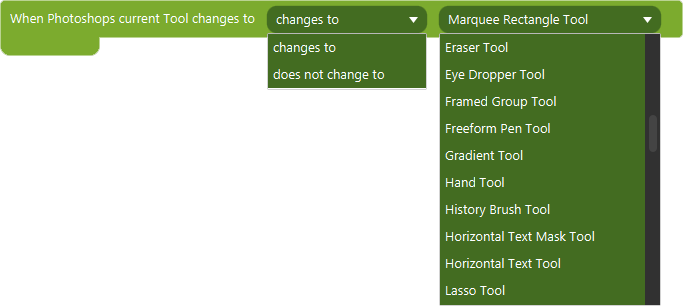
This events allows you to listen to when the tool is changed
When Current Tool Radius Changes

This events allows you to listen to when the radius is changed
When Current Tool Hardness Changes

This events allows you to listen to when the hardness of a brush is changed
When Current Layer Visibility Changes

This events allows you to listen to when the current layer becomes visible or hidden
When Current Layer Locked State Changes

This events allows you to listen to when the current layer becomes locked or unlocked
Hue
Turn On / Off

This action allows you to turn on and off lights, zones and rooms
Set Color

This action allows you to set the color of lights, zones and rooms
Set Color

This action allows you to set the brightness of lights, zones and rooms
Change Brightness

This action allows you to change the brightness of lights, zones and rooms from relative to the current value
Set Color Temperature

This action allows you to change the color temperature of lights, zones and rooms
Change Color Temperature

This action allows you to change the color temperature of lights, zones and rooms relative to the current value
Set Scene

This action allows you to set the scene for rooms or zones
Set Special Effect

This action allows you to start a special effect for lights, rooms or zones
Set Alert

This action allows you to start an alert for lights, rooms or zones
Restore Light Source State From Value

This action allows you to restore a source (light, room or zone) from a stored Hue State
Store The Current Light Source State Into A Value
