Open the button you want the have as a toggle button. I have already given it a background color and a text. We will use this button as a toggle button.
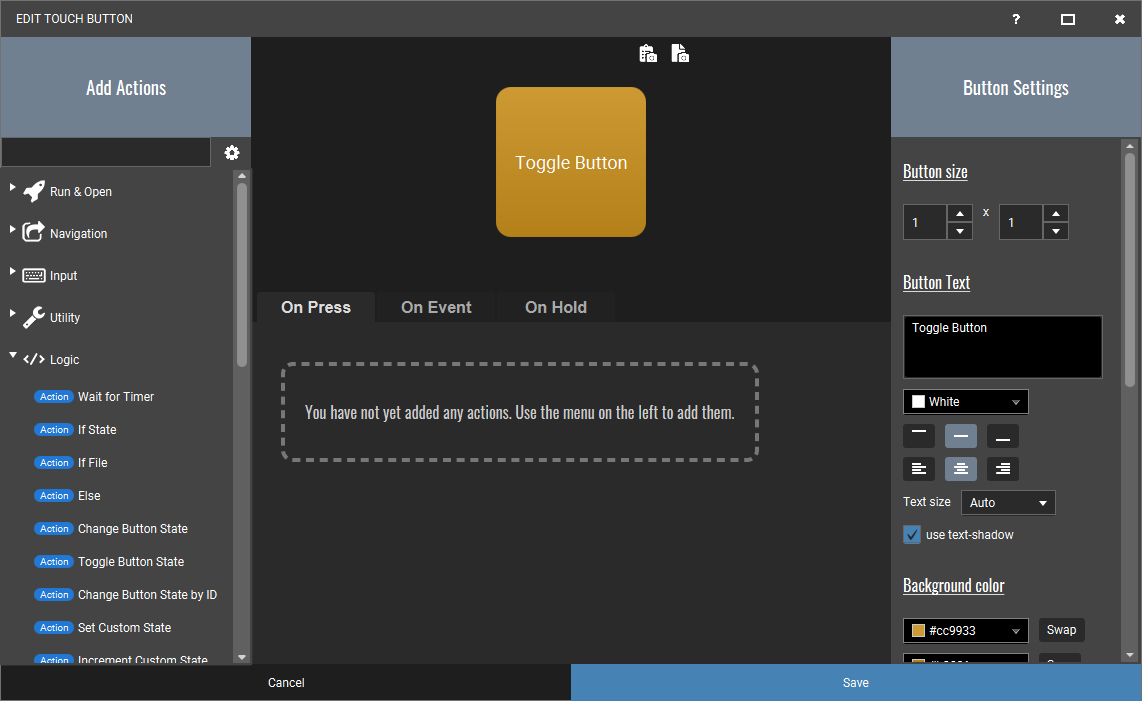
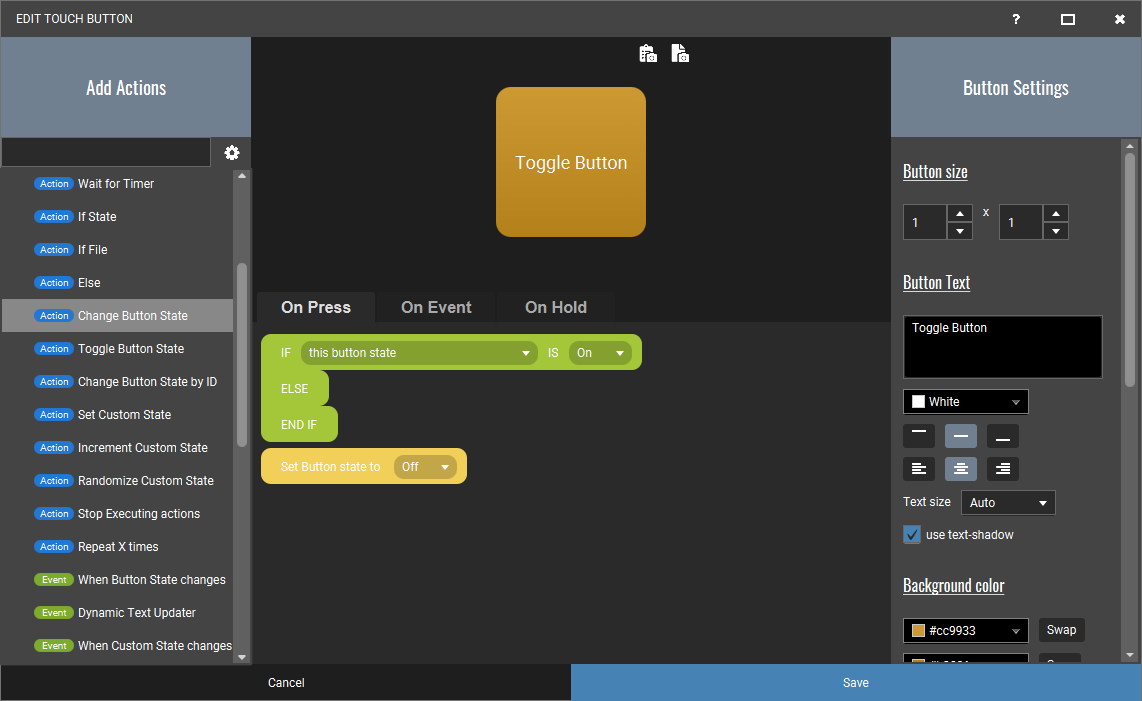
Go to the actions library on the left. Select the category called Logic. Select the action called If State. It will show the following actino flow:
Select the same options as shown.
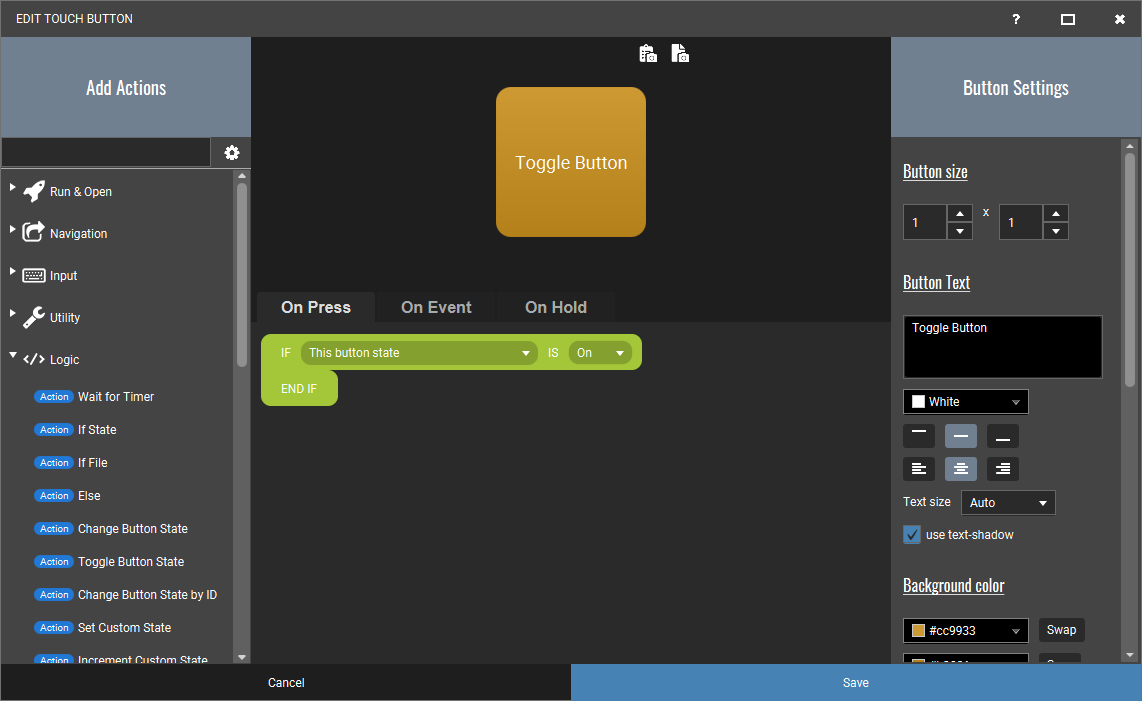
Now go to the actions library again and select the logic actions called Elseto add it. Your buttons "On Press" action flow list will look like this:
So this looks nice and all, but what does this mean?
Well these three lines act as a way of executing the actions. A button has a state. This means in this case it is either ON or OFF. The state alone has no actual value, it is just what it is. Nothing happens when the state changes. However, Touch Portal comes alive when we start to act on the state. Then suddenly it has great value.
So back to our actions. When you press this button, it will first initiate the if statement. If the state of the button is ON then it will execute ALL action that are under the IF action all the way until it reaches a Else action or an End If action. If the button state if OFF, it fails the if statement so instead it will execute the Else flow if it is present. Currently both flows are empty so nothing will be executed.
Go to the actions library on the left. Select the category called Logic. Select the action called Change Button State. It will show you a popup. Select OFF and add the action. Your button will now look like this:
So this is not good, it will now always set the state of the button to OFF because it will be executed always after the IF statement is handled. Lets rearrange it a bit and fix the button in such a way that it will change the state each time we press the button:
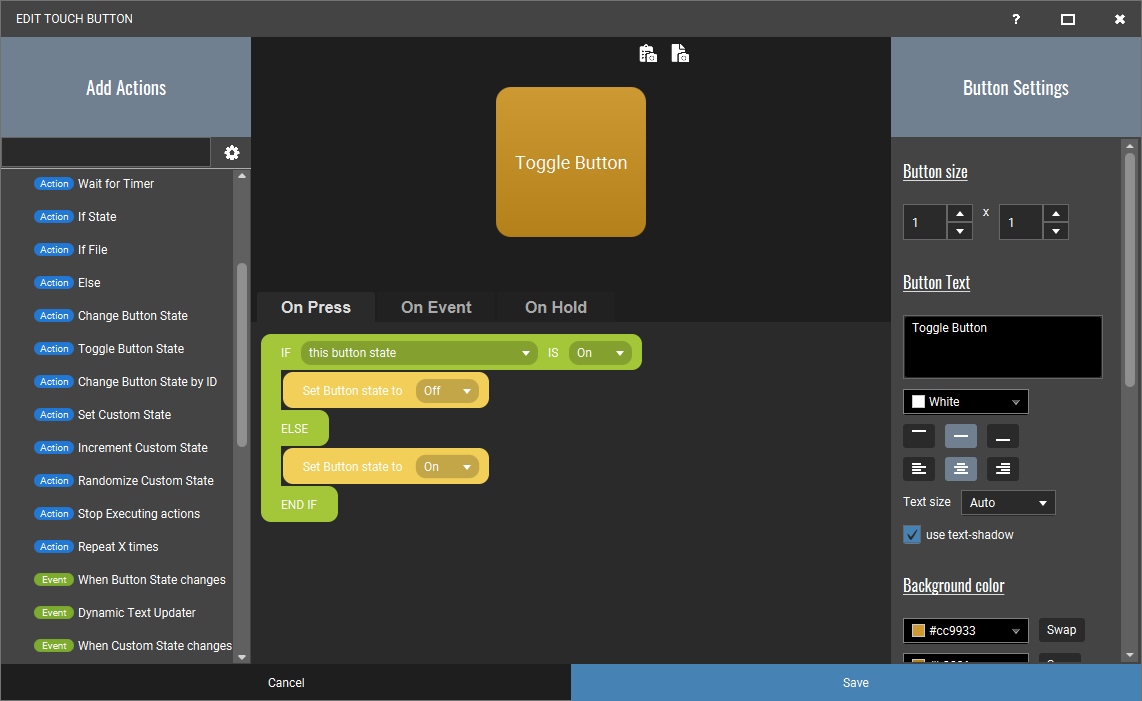
So here we have a button that toggles the state each time you press the button. So what happens here? Well, if you press the button it will check the state and if it is ON, it will turn the state to OFF, if it is OFF however, it will change it to ON. Just remember, as long as we do not act to the state change, nothing will actually happen when pressing this button.
So now our button toggles in state, we also need to add the action we want to do when we are toggling. For most applications a key press combination is used. So we will do the same thing.
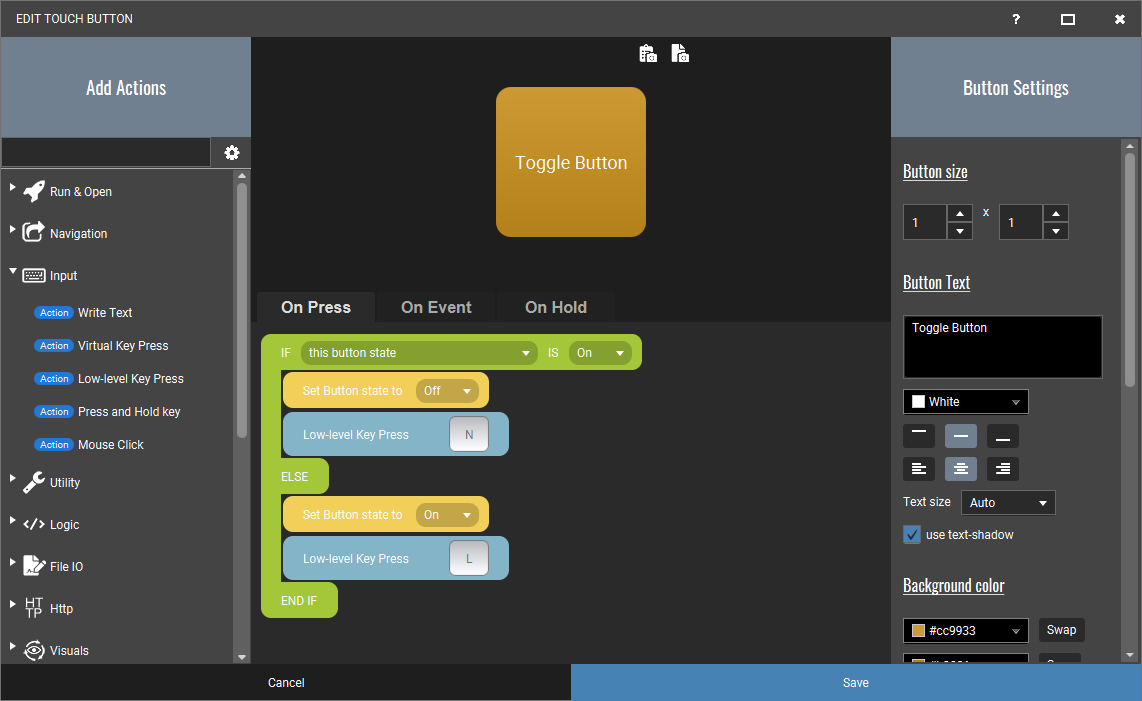
Our game we are creating this button for uses the short-key "L" to turn ON the lights of my car. It uses the short-key "N" to turn OFF the lights of our car. By adding these actions in the correct blocks of our If statement. the state of the button and the state of the lights in the game are synched.
If we press the button and the state is OFF, it will:
If we press the button and the state is ON, it will:
So now if we use this button in our game, it will turn off and on the lights of our car!
Although the button works, we do not get any visual feedback of what the state of our button is. Let's add some visuals!
We are going to use the events tab of the buttons for this. Events are triggered when the event happens, not when the button is pressed. In our case the events are triggered when we press the button but that does not always have to be the case, which makes events a powerfull tool!
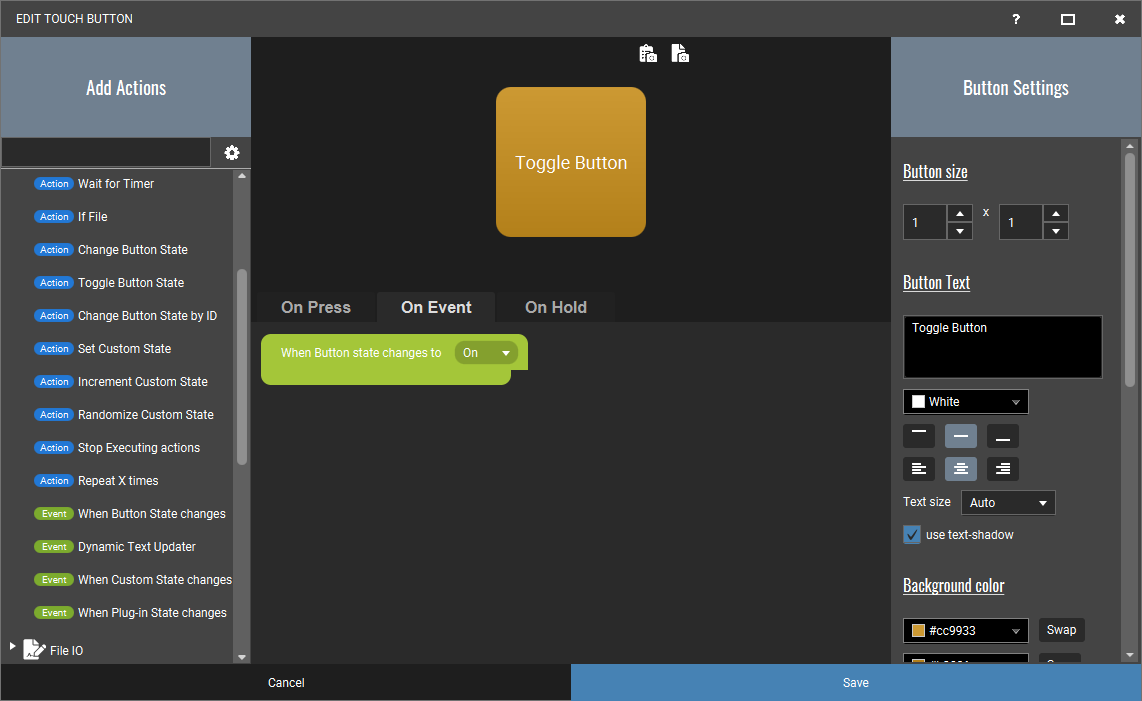
Go to the action library and select "When Button State change event" from the
Logic category. You are now change from the On Press to the On Event
tab.
Events have their own tab in a button because they are not triggered when
the button is pressed but they are triggered when the selected event happens
and this button is on the current active page.
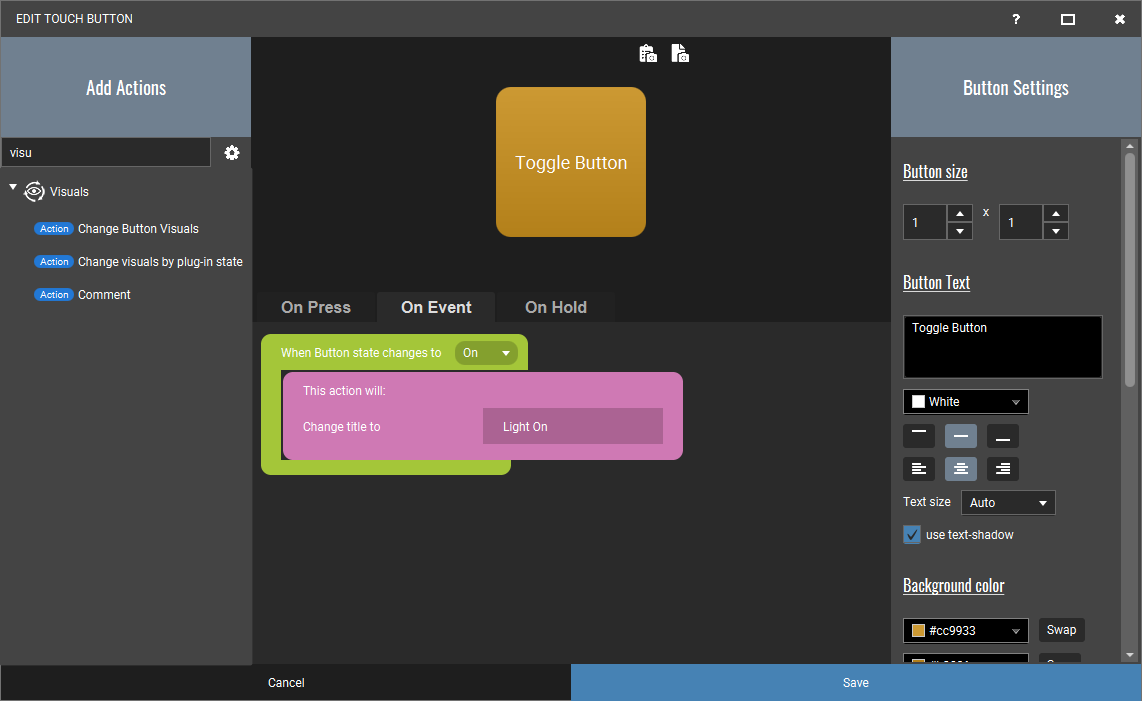
In our case we added an event for when the button state changes to ON. It should look like this:
Now whenever the state of the button changes to ON it will run the action below the event. Lets add a Change Button Visuals action to the event (ensure the events tab is still open when selecting this action):

As you can see I have selected to change the title of the button and set a new text for the button. Add the action and it will look like this:
So from now on, no matter what changes this buttons state, it will act on it. There are actions that can change a button state of another button, using these events will be good because it will be triggered when that happens as well.
We should now also add the event and the visuals change for the OFF state. The final events tab should look like this:
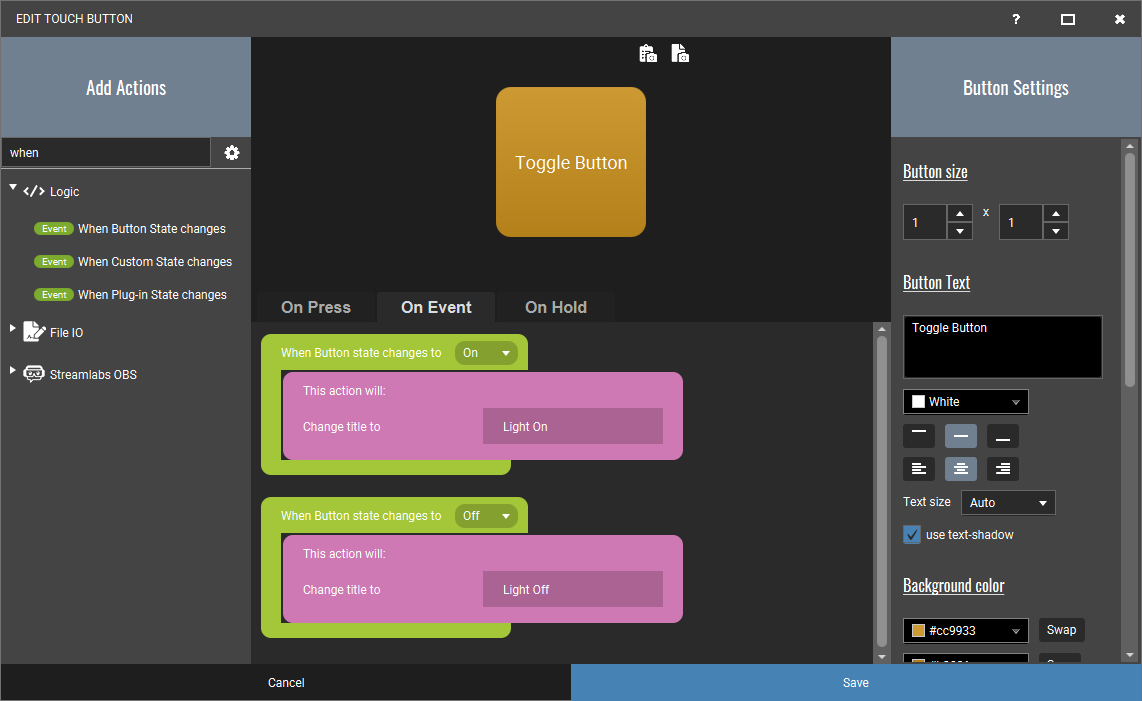
You now have a fully working toggle button, fully customizable for your usage. For some applications like OBS and Streamlabs OBS we also have events that are triggered when you change a scene for example, or when your streaming state changes. But we will go a bit deeper in these kind of things in another tutorial.