First we need to go to the settings page of Touch Portal to add your Twitch account. Touch Portal needs your account to be able to act on its behalf and send actions when you choose to do so with our Twitch actions.
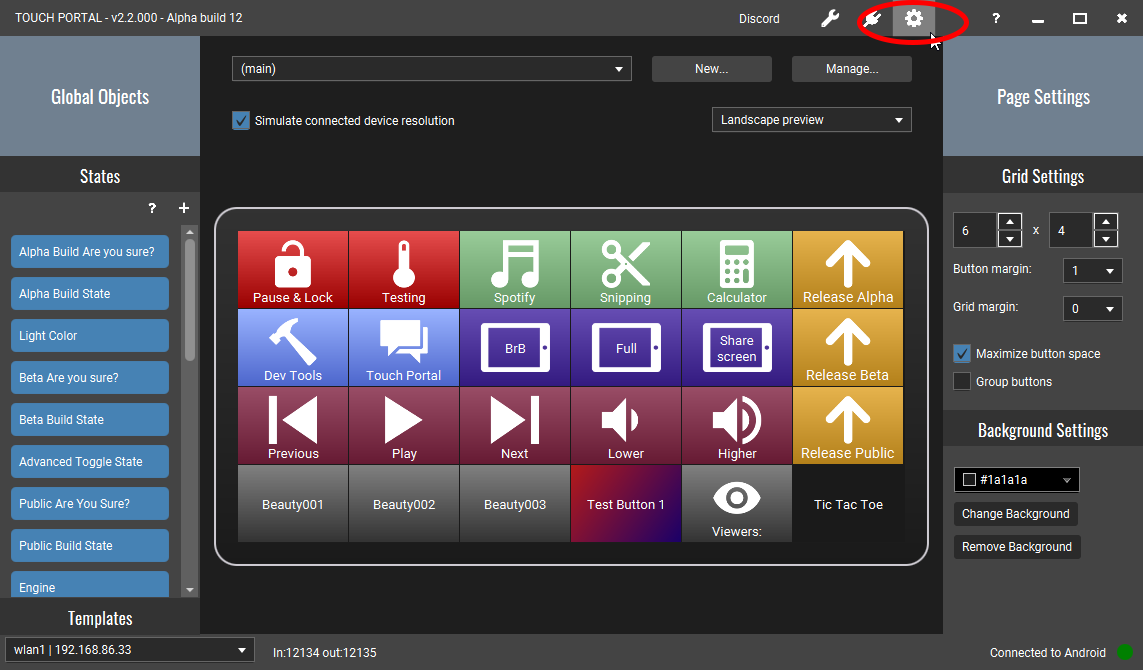
Click on the cog icon on the top bar of the main screen.
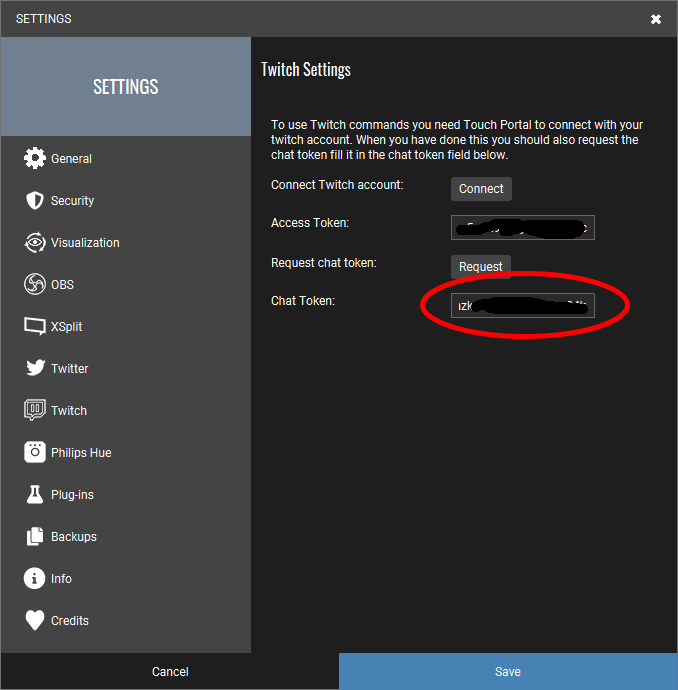
Then select the section Twitch. This is the section where you can add your account.

Then we need to add the Twitch access token. This token is required for doing actions directly to Twitch such as making a clip or starting ads.
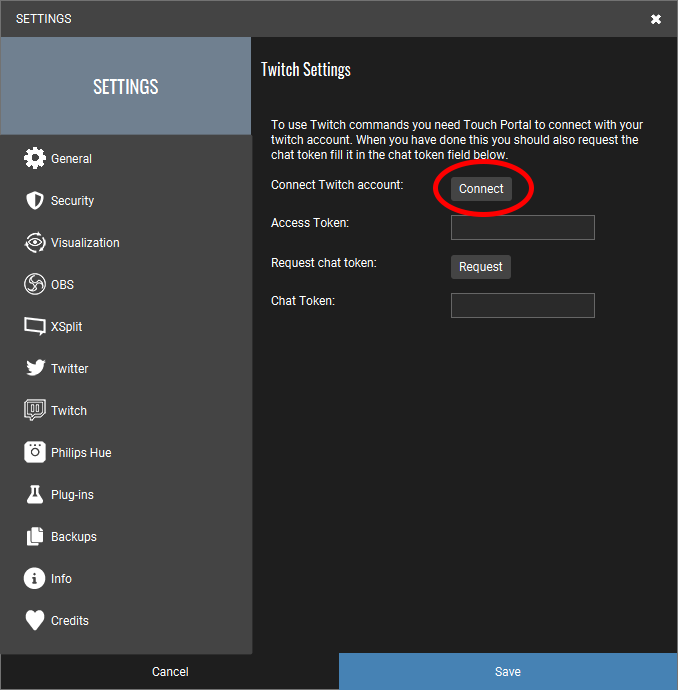
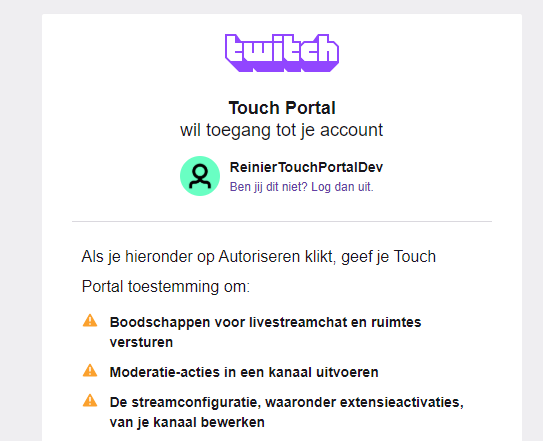
When you press the "Connect" button it will open up the Twitch authorization page. This is a webpage from Twitch in which you need to allow your account to be used by Touch Portal. It depends on how you have set up your Twitch how these look like (with settings like 2FA)
At the end of this process you will be re-directed to a Touch Portal end point that will show you the access token. You need to copy this.
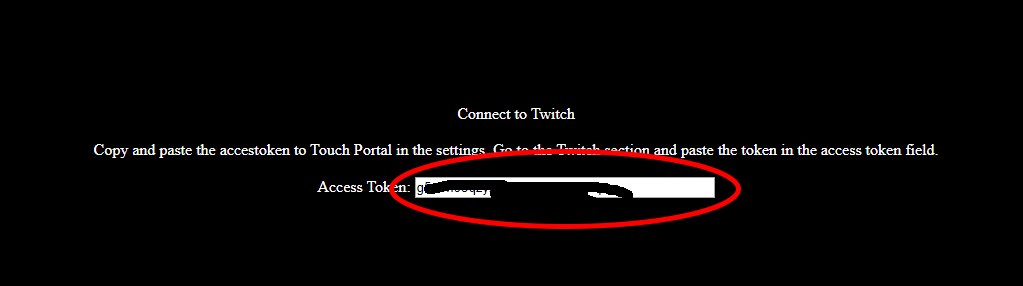
Now paste the copied accesstoken in the field below the "Connect" button.
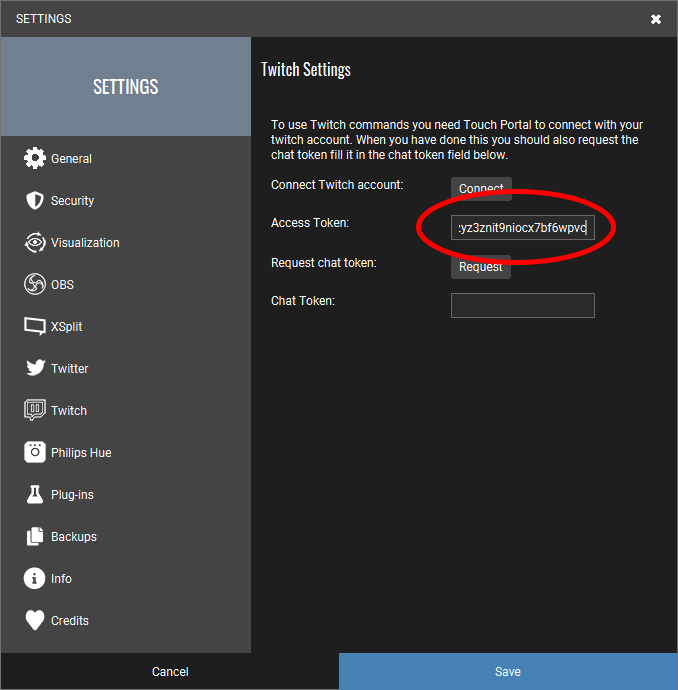
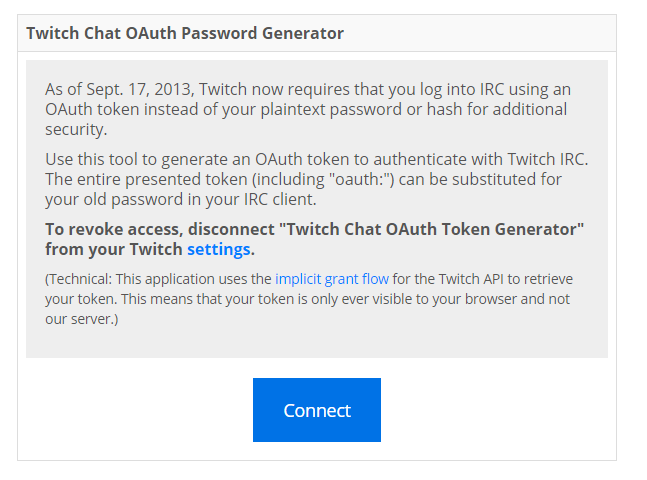
The next thing we need is the chat token. For all Twitch chat related actions and events we need this token, otherwise they will not work. So click on the "Request". Since we are already connected, we need to request the token.

This will lead you to the page with this blue "Connect" button on it. Click on this button.
Copy this full password string.
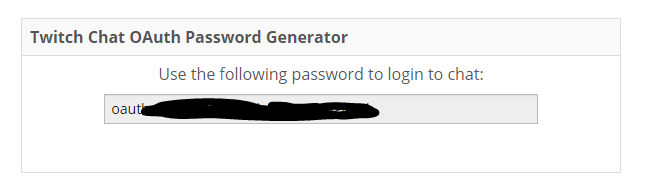
And then paste it in the textfield in Touch Portal.
Now click Save and your account is connected and stored locally so that Touch Portal can now do Twitch actions. To be certain that everything is loaded correctly we advise to fully close Touch Portal and restart. You can fully close Touch Portal by right-clicking the icon in the system tray on windows and choose "Exit". On Mac you can do the same but the icon is on the top bar in MacOS.
You now have learned how to change the visual representation of your button and you now know how to add actions to the button.